Tuesday, July 15, 2025

JULY MID-MONTH TWO OLD BATS REMINDER

Here we are half-way through our July Halloween challenge and this is a reminder that there's still plenty of time to enter your projects. And remember that your project can be "anything Halloween" - our mood board is for inspiration that you can follow - or not.


My project is a completely different direction from the mood board, although I guess one could say that the colors and tone of the card is similar to the lower left quadrant.

I've had a black filigree die cut frame hanging out in my Halloween stash for a couple of years and was determined to use it finally, although I wasn't sure where I was going to go with it. I ended up making a card from a scrap of two-sided printed spider web stock and attaching the frame at an angle. I glued a rectangle of some bat printed paper to the frame - these papers are from a 12x12 stack from Park Lane ("Haunted Hollow") with lots of somber-toned prints that are a bit on the ghoulish side, but I love them! The front of the card seemed like it needed more than just a framed panel with bats, so I decided to add a torn vellum strip that I white heat-embossed the sentiment on, attached it, and added a mauve twine tie and black die cut bat. The custom envelope is also from the same paper stack.     


To make the treat box, I used the same materials. I didn't have mauve twine, so I made it by passing a length of off-white twine under the wide end of a BV23 "Grayish Lavender" Copic marker.


Friday, July 11, 2025

TIME TO KICK BACK!

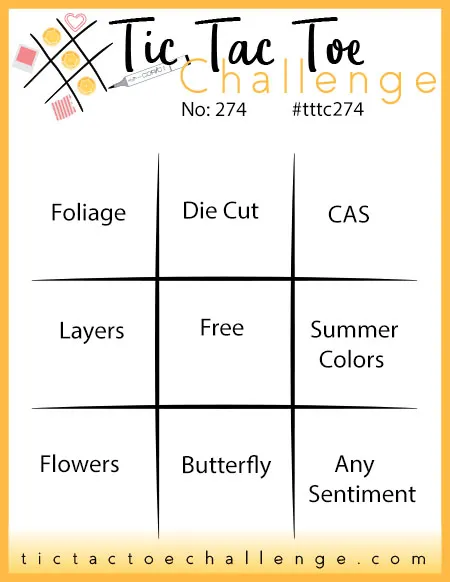
Ah, summer! I've been thinking about vacation and next week we will be headed to the central Oregon coast for a 5-day respite, so I was inspired by ideas at two of my regular challenges: Tic Tac Toe and The Paper Players. Each of them had elements for me to borrow for this card.


I started this card by making a card base from an old sheet of  bright blue water printed card stock with glitzy bubbles printed along one side. I left off the bubbles for the card base but used them for a smaller die cut rectangular panel that I matted with yellow and white papers before attaching the layers to the face of the card. I white heat-embossed the sentiment and then constructed a summery cocktail from Tim Holtz's "Happy Hour" die set. I struggled to make a glass with vellum (because I wanted it to be transparent) and ended up using two layers of vellum, inserting the drink and accompaniments between the layers. I don't think it was totally successful, but I'm sharing it anyway!


The center row across - Layers/Free/Summer Colors:

TTTC274 - Featured Designer Design Team X - Tic Tac Toe Challenge


Paper printed with circles, as well as a slice of lemon:


Sunday, July 6, 2025

BIRTHDAY WISHES

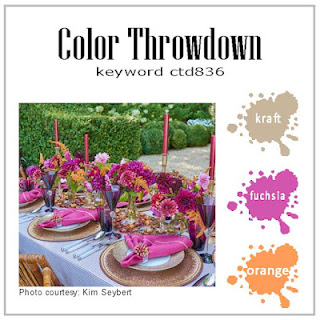
I'm in need of a couple of birthday cards this week and decided to make two at the same time to save myself some grief. I was inspired by Color Throwdown Challenge #823 - kraft, fuscia, and orange. I made an A2 card base and matching envelope from some kraft paper I had in my stash.


I'm fond of the spotlight technique and stamped the Hampton Art #SC1013 flower-filled envelope with black ink twice - once on the face of the card and the second time on an extra scrap. I colored the scrap with markers, cut the image out with stitched die, and attached it over the uncolored image. the final step was to white heat emboss a PTI sentiment on a strip of black cardstock and glue it to the face. 


I finished the inside off with a small portion of the same image in black, die cut it with a rectangular stitched die, matted it with black cardstock, and attached it to the inside where I'll hand write a message, I lined the matching envelope with some fuscia-colored printed paper.


Color Throwdown: Color Throwdown Challenge #836


Saturday, July 5, 2025

OUR BIRTHDAY BOY

Our grandson hits the magic age of 16 in September and he'll be down to the DMV at 8:00 AM to take his driver's license test, and of course he'll pass. His dad has an older model silver-toned pickup truck that will become his "new" wheels. As far as his parents are concerned, it can't come a moment too soon because they're sick of running him, his twin sister, and younger sister back and forth between school and soccer practice. So, you can guess where I was going with this birthday card!


I started with a bunch of coordinating soccer papers by Authentique that I purchased last year before his 15th birthday. The pickup die set is new to me from Whimsy Stamps ("Truck Die Set" #WSD122) and I die cut the pieces from dull silver vellum and added bright silver accents, which don't show up very well with this photo. I got the idea that I wanted to cut an opening through the card base and background soccer field and slip a black and white photo of him inside the truck. Of course, he's hauling soccer balls and die cut numbers (PTI).

When the card is opened, there's his photo and die-cut sentiment (PTI) with more of the coordinating papers. I found a sheet of paper that's printed grass to use as lining in the black square envelope.


There are a couple of challenges I wanted to share this with:

NBUS because of the brand new truck die:


And the Pretty Papers challenge. I'm not sure how "pretty" these papers are, but they are definitely coordinated:


Tuesday, July 1, 2025

JULY TWO OLD BATS HALLOWEEN CHALLENGE

Here we are in July and our favorite Ghoul Friends have a new inspiration board for us at Two Old Bats Halloween Challenge - actually, you're not required to use the board. It's there for your inspiration, but I usually like using it to get myself jump-started.
 
I think you can see from my card that I definitely went with the lower right quadrant of the board! 


I die cut a deckled rectangle out of gray cardstock and then started assembling the scene with a variety of manufacturers' products. Using black ink from Memento I stamped a grassy knoll from Whimsy Stamps "Zombie Party" and a leafless tree from Newton's Nook "Spooky Street". I overlaid a moon that I had created from Tim Holtz's "Halftone Halloween" by stamping with grayish tones on  tan cardstock and then blending and die cutting it with circle die. I glued it to the face of the gray deckled rectangle and stamped the tree again. The bat is from Newton's Nook "Spooky Street" and the cat and pumpkin are from Unity "Toil and Trouble" - I stamped and colored them, fussy-cut them, and attached them to the face of the card with black dimensional foam. Finally, I attached all of this to a black card base and created a coordinating envelope, adding a sentiment and cat from LDRS Creative "Wicked" to the flap.  


It's now your turn! If we get to 25 entries the ladies can finally reward someone with the alien dies from Whimsy Stamps that have been hanging about for months!


And as long as we're on the subject of cats: Here are Tux and Tiger. Would you believe that these two boys were litter mates? It's hard to believe as they are so different - born to Chloe our calico a couple of years ago.


CHRISTMAS IN JULY

It's a very hot day today on this 1st day of July - what better thing to do than to hide myself away in my office/craft room and make a Christmas card? My inspiration today was over at Peace on Earth Christmas Challenge #90, where I was interested in the tall green and turquoise trees on the Christmas shelf at the right top quadrant. 


I had this partially made piece of a card from a couple of years ago - see the original here. I trimmed it down from a slimline size to fit on a standard A2 card base, matted it with a slightly larger white die cut rectangle, and added 3 miniature trees and a shooting star from Alexandra Renke's "Winter Village" die set. The trees and star were die cut from glitter cardstock.