Sunday, May 28, 2023

THE PAPER PLAYERS SKETCH CHALLENGE #PP642

Another Sunday, another Paper Players Challenge! This week it's our friend LeAnne's turn and she's chosen a sketch for us to play with. 

https://thepaperplayers.blogspot.com/2023/05/pp642-sketch-challenge-from-leanne.html


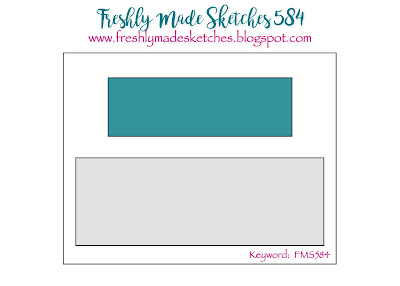
I had to think on this one for a while, because I couldn't figure out whether I wanted to do it as a Christmas card, birthday card, or just general greeting. I settled on general greeting. I started with a white card base and a die cut stitched rectangle. I had a small frame of gold card stock in my clippings box that looked like it was the right proportion. Also in my scraps was a small piece of Japanese rice paper with these beautiful cranes that I've been hoarding for years. I placed a black panel inside the gold frame and attached both to the face of the stitched rectangle. Then I trimmed down a piece of the rice paper and centered it over the black panel. I knew I wanted to wrap a ribbon of sorts around the panel to act as the horizontal element, and digging through my piles of ribbon pieces I found this small length of gold silk cord. I had an idea to find a fancy knot to tie it in and went to an old Japanese gift-wrapping book. I found exactly what I was looking for and tied it around the panel and attached the panel to the card base with dimensional foam. My final step was a black die cut PTI "Tiny Tag" with the sentiment from Hero Arts #CM351 heat embossed and then attached below the knot. 


I'm pleased with the simplicity of this card - plus finally being able to use this Japanese rice paper scrap. I played a bit loose with the horizontal element of LeAnne's sketch, but she'll probably forgive me! Take a look at what the other designers have come up with to inspire you and join us in the fun.  


Saturday, May 27, 2023

"S" IS FOR "SCREW IT"

Well, here I am again fulfilling the role of Guest Designer at The Sisterhood of Snarky Stampers, one of my favorite challenges. It seems like each time I do this, the challenge (or Edna) throws a new kind of wrench at me that requires research, and this time around is no different! It's SOSS#235 - "S is for Steampunk".

Wikipedia:  "Steampunk is a subgenre of science fiction that incorporates retro futuristic technology and aesthetics inspired by 19th-century industrial steam-powered machinery. Steampunk works are often set in an alternative history of the Victorian era or the American "Wild West", where steam power remains in mainstream use, or in a fantasy world that similarly employs steam power."

I pretty much knew this, but how to interpret it into the making of a card - a snarky one for that matter - took me to hundreds of Pinterest examples, mostly far beyond what my skills or supplies might render. It seemed like I might need to consider metallics and cogs and gears and rather gritty backgrounds. It also required a trip to my local craft store where I found some Tim Holtz images.

When a predominantly CAS designer considers Steampunk, it's definitely a clash of styles! But, without further ado, here is my take on what might be termed "Snarky Stamp-punk":


I started this with some scraps of printed paper that I've had in my stash forever - those pages that used to be included in the card making magazines. I trimmed one of them down with a stitched edge die and blended Tim Holtz gears stencil with brown ink. Over that I stamped his watch gears with VersaMark ink and gold embossing powder, grunged up the edges and attached it to the face of a brown card base, along with a printed kraft page as a mat. I wanted the sentiment to appear to be a manufacturer's plaque on an old steam engine or part, so I gold embossed the sentiment (Unity Stamp Company #IB-815 "Screw It") on a scrap of woodgrain copper metallic card stock and die cut it with one of my oval dies. I die cut a second oval from some bronze card stock and attached the two ovals with a couple of copper brads. I then attached the ovals to the face of the card with some dimensional foam. It seemed like it needed a bit more, so I bent a length of brass florist's wire through one of the holes in the die and coiled the ends with a small paint brush handle.


I used a bit of coordinating lighter-weight paper to line a Kraft A6 envelope on which I had stenciled and stamped gears, and when the envelope opens a Victorian gentleman peers out from the inside of the envelope.


Here's Edna in all of her steampunkiness!


Thursday, May 25, 2023

TAKE A HIKE

I'm really pleased to be guest designing at Tic Tac Toe this week! The new #210 challenge board gives you a lot to choose from - pick three and join the fun, and if you go over to the blog, you'll see what the regular design team members have come up with to inspire you.


I chose the top horizontal row - Slimline Card/Trees/Green. Probably the obvious choice for this would have been to do a Christmas card, but I'm just not up for that yet! Instead, I chose a general greeting card.


I wasn't entirely pleased with the way this card photographed. I used a pale pastel yellow-green that just doesn't show very well. The cardstock is a bit lighter-weight than I like using and the corners were a bit delicate - I should have backed it with a heavier stock to make the edges sturdier. 


Well, having said all of that, I started the card with a slimline shape and used Tim Holtz evergreen tree dies (Sizzix "Thinlits" #660978) and cut them from two different papers - a polka dot embossed card stock in a slightly darker pale green and a dark evergreen solid card stock. I cut a rectangle slightly smaller than the card in the matching stock and glued the first tree directly to it, overlapping a printed green patterned paper on which I had stamped a sentiment from Simple Stories "Simple Vintage Great Escape" #13222 with PTI "Pinefeather" ink. I also added a couple of birds from the same set with PTI "Soft Stone" and glued together a couple of layers of trees and blended a bit of green ink to the bottom tips and attached it to the face of the card with some dimensional foam. I finished with a coordinating envelope from some printed stock in my stash.


Sunday, May 21, 2023

PAPER PLAYERS CAS

It's Monday again and time for a new challenge at The Paper Players, and our lovely Joanne has come up with a CAS challenge PP641 - "One Image". Anyone who's been following my blog for any amount of time knows that CAS is my favorite card style!  


I broke down and actually purchased a stamp set this week - primarily to participate in a Guest Design slot over at The Sisterhood of Snarky Stampers next week. I won't spoil the surprise of the challenge and tell you what it is and why I needed to add to my stash, but the stencil/stamp set had a couple of great sentiments that I'll be using in the near future. I particularly like this one and chose to use it with a single image (the cumulus clouds from Hero Arts #CM357). It's really two separate clouds, but I stamped them more than once so I could layer them into a single image. 


I started with a very pale aqua card stock that I die cut into a stitched rectangle and stamped the sentiment in black, layered it with gray cardstock, and matted it with a larger white die-cut rectangle. I stamped the clouds a couple of times and fussy cut them and colored them with a gray Prisma colored pencil. After attaching the layers of front panel/sentiment to a white card base, I glued the clouds to the front with some dimensional foam - and voila!

Come along on the fun and do a CAS card for Joanne!


Monday, May 15, 2023

TWO OLD BATS - MID-MONTH

We're mid-month in May already and time for the Design Team to post further inspiration for the May Everything Halloween Challenge. 


This card didn't turn out anything close to what I had intended. My original intention was to make a wreath similar to the one on the right top corner of the mood board. You can see that this is NOT a wreath, although it has a similar oval background shape, is ivory-toned, and features a skeleton - and that's about it. After many attempts to get to a wreath, I finally just gave up and made my skeleton appear to pop out of a grouping of three pieced and fussy cut pumpkins. There was lots of fussy cutting on this card - the skeleton, the pumpkins, the sentiment, and the tiny skull on the sentiment. All of these images are from my stash of ancient stamps and Halloween papers. 


If you haven't had a chance to join in on our Halloween fun, you still have a little over 2 weeks to do it. Get out those Halloween supplies, dust them off, and jump in here!

Sunday, May 14, 2023

HAPPY MOTHER'S DAY

Today our Sunday challenge at The Paper Players PP640 aligns with Mother's Day and it's a perfect opportunity to use the color challenge for a Mother's Day card for my daughter-in-law.


Our color challenge by our beloved Jaydee is pink, green, silver/gray, and black & white. I decided to go primarily with the black & white, small touches of pink and green, and silver embellishments. I started by stamping HA + Gina K #PR101 twice - once on a white cardstock base and a second time on a smaller die cut stitched rectangle. I die cut a small square from the stitched rectangular panel and colored the blooms and leaves with markers and then attached it to the black and white panel with several additional layers of cardstock for a bit of dimension. I die cut a silver frame, tied a piece of twine around it, and attached it over the face of the card with some dimensional foam and added silver sequins.  


I stamped part of the rose image on another die cut stitched rectangle for the inside panel, stamped the sentiment in bright pink and added a die cut "happy" in the same silver stock as the frame.


Come and join us with Jaydee's color challenge!


While I'm adding this card to our challenge, I'm also sending it over to Shopping Our Stash #SOS496 - "She's a Lady" where the challenge is to make a card with a woman or for a special woman in our life. My daughter-in-law definitely qualifies!


Sunday, May 7, 2023

PAPER PLAYERS - RAINY DAYS

My goodness, another Sunday has rolled around, and this week our Paper Players challenge theme is brought to us by the wonderful Claire - "Rainy Days". We've had some of those this week here in southern Oregon.


And because the weather is overcast my cellphone photo is showing up as predominantly gray, instead of the subtle blue-gray-green of the Stampin' Up "Country Gingham" DSP that I used for background and mat on my 5-1/2" square card. I've used this Rain or Shine image and sentiment by Hot Off the Press, Inc. many times over the years. It's absolutely the only thing in my supply cache with any reference to rain. I printed the image twice with black ink - once on the patterned paper and once on white cardstock. I colored the sun directly on the patterned paper with Copic markers and then shaded and fussy cut the cloud and a couple of the raindrops and attached the cloud over the patterned paper with dimensional foam. The raindrops on the background paper got some white gel pen treatment and I added a couple of additional drops and then slipped the black and white sentiment strip under the cloud, trimmed it on the right side, punched a hole through the layers and added a couple of lengths of black and white baker's twine.

This is a fun theme and I'm hoping you'll all join in on the fun. 

Kittie Update: Well, Thursday night's final trapping yielded 2 cats. I was hoping for 3, but the trapping was fairly dramatic, and the final juvenile cat stayed away after almost being trapped. I trapped the final tuxedo (who, surprisingly to me, turned out to be a pregnant female - she's so small that I didn't know she had matured enough) and the neighborhood sperm donor - a huge Himalayan who has been responsible for lots of blue-eyed kittens that have popped up (a couple of which we have in our own home). He's a huge brute and I was never able to locate his owner, although he may be a stray. He's way smart and I watched him go into the first trap and reach over the trip plate and fish out the food with his paw! Then he entered the 2nd cage, and this time tripped the trap. He made quite a racket. 

Some of you have asked about the mama cat. After her release last Friday evening, we didn't see her for a couple of days. But she showed back up looking a bit more bright-eyed a couple of days later and very hungry. She has now been showing up regularly for feeding each morning and we're assuming she's still nursing her babies. They must be about 4 weeks old now, so it probably won't be long before she brings them into the patio. I still don't have the slightest idea where she's stashing them.

Saturday, May 6, 2023

SLIMLINE BIRTHDAY

I had a bit of time to myself this afternoon, so chose to use it to enter a couple of challenges (instead of cleaning up my office/craft room). This week has been intense and it's nice to just kick back for a bit. I started by trying to come up with a way to combine this week's Color Throwdown #741 - "Sage Green, Pink, Yellow, and Brown" and Freshly Made Sketches #584 - "A Sketch by Linda".


I chose to do this as a slimline format because of the sketch by Linda being predominately horizontal. I cut and folded brown cardstock into a slimline top-folded card base. Then on white cardstock I stamped a cupcake image that I've had forever - I have no idea how long I've had it or who manufactured the set it came from, but I've used it many times before. I stamped it with PTI "Dark Chocolate", overlapping the images since my plan was to return and overlay individual pieced cupcakes in the three pastel tones. Before doing that, I colored the centers of each of the flames and then blended a yellow circle around each of the flames. I printed a bunch of cupcake papers on kraft paper and cut them out and pieced them onto the yellow, green, and pink cupcakes and then fussy cut all of the cupcakes out (cutting off the flame) and layered them on the face of the white panel. I also die cut the brown birthday sentiment from an old PTI birthday set and stamped a "HAPPY" vertically with brown ink. Finally, I matted the white panel with pink and glued all to the brown card base and made a coordinating envelope. It took many steps to make a simple card - I didn't bother to note all of the steps!

Color Throwdown: Color Throwdown Countdown #741


Wednesday, May 3, 2023

TALKING DIRTY IN THE GARDEN

I have so much to do today, but why not cramp my time even more by making a quick card for the current Sisterhood of Snarky Stampers #233 -"F is for Flowers"? I had to rack my brain a bit to come up with what one snarky flower might say to another!


So, this is one possibility. I'm sure there are many more, but as I said, time is short. I used a favorite image of mine from Inkadinkado (#60-31604 "Funky Flowers") to start and stamped it twice with PTI "Pinefeather" and die cut one of the stamped images with a stitched rectangular die. The second one I used to color and fussy cut two of the flowers. I computer generated the sentiments on green cardstock, cut them into strips, and glued them to the face of the main panel. Then I masked off a portion of the panel and blended on some green ink. I did the same with the card base and glued the panel over it with dimensional foam and added some green strips to the edge of the card (although it looks like they're not quite straight!). The final step was to attach the colored and fussy cut flowers over the strips.


So, this is what the flowers in my garden probably say to each other when I'm not listening! You should join me over at The Sisterhood of Snarky Stampers with your own version!


Added May 16, 2023:


Monday, May 1, 2023

PUMPKINS OUT OF SEASON!

Here we are already in the fifth month of the year - only 182 shopping days until Halloween! At Two Old Bats Halloween Challenge for May we have a brand-new mood board with lots of late spring flowers and pumpkins - oh yes, and bats and spiders.  

Two Old Bats Halloween Challenge: May Anything Halloween


This card was started with a black stitched rectangle that I die cut a circle from and overlaid it onto some purple polka dots. The sentiment was heat embossed with white, the rectangle was glued to a black card base, and a strip of purple and black printed paper from Graphic 45 was layered over. I stamped, colored, and fussy cut a pumpkin from a very old Halloween stamp set and filled the top with die-cut leaves and flowers. The final step was to add a couple of Tim Holtz bats above the pumpkin's head.

Now that we have a fresh mood board to play with, you'll want to get out all of those Halloween supplies and join us!